Sunday, May 15, 2016

Because I wanted to....


No reason other than I like to bake on the weekends, saw this recipie online, had dates that needed to be used, and have a peanut butter addiction. Enjoy :)

Salted Caramel Peanut Butter Cup Tart

Ingredients
  • FOR THE CRUST:
  • ¾ cup medjool pitted dates --  (soaked in hot water for 5 minutes)
  • ¾ cup roasted peanuts

  • FOR THE FILLING:
  • ¾ cup nuts n more salted caramel peanut butter (or a bit more like a cup :))
  • 2 Tbsp. pure maple syrup
  • 1 Tbsp. Oat flour 

  • FOR THE TOPPING:
  • 3 Tbsp. Melted coconut oil
  • 6 Tbsp. cocoa powder 
  • 1 and ½ Tbsp. pure maple syrup
  • A nice pour of vanilla extract
  • (Optional for topping: peanuts and sea salt) 
  • 1 bar of trader joes dark chocolate melted 
Directions:
For the crust: 
1. Get a round tart pan 
2. Soak the dates for 5 minutes in hot water. 
3. Drain the dates and add them to a food processor with the peanuts. Pulse until a sticky ball forms. Press into prepared cake pan. Place in the fridge while you make your filling.

For the filling: 
1. melt peanut butter in a small pan. 
2. Once melted remove from heat and add maple syrup and oat flour. 
3. Mix to combine well. ( mixture will be on the drier side but it should form a ball.

4. spread the filling onto the prepared crust. Press it flat with your fingers, then place it in the freezer to set (at least 30mins) 

For the topping:
1.  Add melted coconut oil, cocoa powder, maple syrup, and vanilla to a bowl.
2. Mix well until combined. 

To assemble: 
  1. Press topping over the filling, using a spatula to make sure the entire top is covered. ( I ran out of coconut oil so I think mine was a bit drier and coco powerish) ( I know there are some chocolate haters so I left some plain 😳 those people can't be trusted) 
  2. Top with chopped peanuts and drizzle with melted chocolate bar....because there is nut such a things as too much chocolate. 
  3.  Store in the fridge, tightly wrapped in press and seal 

Recipe adapted from:http://www.fooduzzi.com/2016/05/peanut-butter-cup-tart/

Wednesday, May 11, 2016

Vanilla peanut butter


I have been sharing my love for PE Select with my coworkers. They have seen my posts and became very interested! I gave them some to sample and both ended up purchasing and have been loving it! One of the coworkers bought the vanilla and told me it tastes just like ice cream so naturally I took advantage of the vitamin shoppe sale and purchased my own tub of vanilla. Just by chance the day I ran out of peanut butter my powder arrived :) so the first thing I when I got home was make some vanilla peanut butter. Clearly have self control....
Enjoy! 
Ingredients: 
1/2 scoop of PE select gourmet vanilla flavor 
1 bag of Trader Joe's  roasted unsalted peanuts 

Directions: 
1. Place half the peanuts in your food processor followed by the protein powder and then by the rest of the peanuts. 
2. Turn processor on and let the nuts process away. Stop when needed to scrape down sides. 
3. Process until you reach the desired consistency. 

4. Before you eat it all place in air tight container and store in fridge.
5. Enjoy! Try not to eat all at once :) 

Another naner breakfast bread....SO FLUFFY


SO FLUFFY. SO TASTY. AND super easy to make and full protein. A winner all around! If you have been following various posts you know I am always in the hunt for a new, simple, healthy, and tasty to go breakfast. Saw this recipe on Instagram made a few tweaks and found a new winner. Enjoy!

Fluffy naner protein bread

Ingredients: 
2 very ripe naners 
2 scoops of protein powder ( I used PE select snickerdoodle)
4 tbsp coconut flour 
1 egg white 
3/4cup skim milk or milk of choice 
1 tbsp pure maple syrup 
1 tsp baking powder


Directions: 
1. Preheat oven to 350 and line mini loaf pans with parchment paper.
2. Place naners in mixing bowl and mix until they are mashed up.
3. Add in dry ingredients and mix until combined. 
4. Add in egg, syrup and milk and mix until just combined.
5. Divide evenly into prepared pans.
6. Place in oven and bake for 30-45 mins. Top should become golden brown. Keep in mind this is a protein bread so will be a bit more dense and moist.
(Tops were still a bit undercooked in this cooked for about another 10-15 mins after)
7. Let cool in pans and then transfer to a cooling rack. 
8. Store in an airtight container or tin foil in the fridge once completely cooled. Freeze if any left after 3 days. 


Enjoy warm with some peanut or almond butter :) 


Recipe adapted from Monicaevafit@gmail.com

Another twist on my almond biscotti....with a delightful surprise


Like I said with the previous twist on my biscotti I like to experiment when I bake. I know that one of the things I bake that my mom loves is the regular almond biscotti and it was Mother's Day so I wanted to bake to make her happy....but also wanted to experiment with an add it. Clearly went to target to get something else and ended up in the baking isle and walked by these.....
Needless to say they are the delightful surprise that was added. They are not overwhelming but add a nice twist. Enjoy! 

Ingredients: 
1 stick of unsalted butter softened 
1 cup dark brown sugar 
2 eggs
A heafty pour of vanilla 
3 cups of white wheat flour 
A pinch of sea salt 
1 and 1/2 tsp baking powder 
1/2 cup (or to your liking) sliced almonds 
1/2 cup toffee pieces 

Directions: 
1. Cream together butter and sugar until smooth. 

2. Add in eggs and vanilla 

3. Add in 2 cups of the flour, baking soda and salt. Mix until combined 
      ( at this point I usually add in the remaining cup of flour but decided to add in almonds first this time) 
4. Add in almonds and toffee pieces and mix until just combined. Add in final cup of flour and mix in using hands. Dough might seem a tad crumbly so make sure all is incorporated. 


5. Split dough into two equal sized balls. 

6. Place on a work surface and mold into 2 log shapes. Wrap with plastic wrap and place in fridge for an hour or so. ( I did these overnight and I think it made the dough tastier! )

7. When ready preheat oven to 350
  Place logs on baking sheet lined with parchment paper. Place in oven for 20-30 mins ( until golden brown) 


8. When timer goes off take cookie sheet out and turn oven to 335. Cut dough into diagonal slices and arrange on cookie sheet side up

9. Bake on sides of 4-5 mins flip and repeat on other side for 4-5mins (if you want them crispier cook for the longer time. 

10. Place on cooling rack or be like me and burn your mouth eating them :). They go great in a cup of coffee! 


11. If you have any left store in a container! 


Monday, May 2, 2016

I got a request for homemade almond butter 😋🙃

Yum :) if you know me at all you know I have a nut butter obsession. Yes nut butter.....not just one type all types. It is bad real bad...I have been exploring so many new brands as well. If you would like I can start a review section! Although I do  love all the brands and flavors I have been finding I also love to make my own. It is so simple and you can be creative as you would like ( and making your own almond butter is a lot cheaper!) I got a request for some cinnamon raisin almond butter so enjoy! If you would like different versions I have made let me know. 

Cinnamon raisin almond butter: 

Ingredients: 

-one 16 ounce bag of almonds (I used roasted unsalted from Trader Joe's)
-1/4 teaspoon of vanilla 
-1 teaspoon of cinnamon 
-a pinch of nutmeg 
- a box and a half of the snack sized box of raisins (or amount you like)

Directions: 

1. Place almonds followed by spices and vanilla in your food processor.

2. Turn processor on and let mix around and try to wait patiently 🙄 
Mix will begin to crumble. 

3. When ingredients are starting to mix together more pause and mix around with a spatula (wiping down the sides) and make sure all spices are mixing in. 
4. Entertain yourself while it spins around.  Pause and mix around one more time whe the mixture is becoming smooth. 

5. Keep mixing until you have the desired consistency...this one was very smooth so I let it mix for a bit longer than normally do. 


6. Try to have self control  and don't start eating it yet... Only to test the spice ratio. 

7. Add in raisins (I added a pinch or two more of cinnamon as well) 

8. Remove processor blade and using as many spatulas as needed mix raisins around. Make sure to scrape bottom and sides of the middle part.

9. Transfer into jar of choice (this was a gift so used a mason jar but typically I just use a plastic air tight storage container)

10. Enjoy and I store mine in the fridge because it is fresh --stir before enjoying each time as it is natural and the raisins may settle as well. 


Sunday, May 1, 2016

It's the weekend....what do you expect?


I know it is going to be teacher appreciation week but nurses week is also coming up next week. Due to it being Mother's Day next weekend I figured I would be baking for that and decided to make these this weekend (never hurt to be early). My mom is a nurse and does a lot so they are for her with some nice flowers to go with them :) (let's be honest I just needed another reason to bake too 🙄) enjoy and if you are a nurse thank you! 


I know my mom enjoys the almond biscotti I make but wanted to switch it up. I stumbled upon the original version of these cookies and decided to make them (and the title from the original recipe  is true so easy to make!) enjoy! 


Ingredients:
2 cups almond flour 
1/2 teaspoon baking powder
1/3 cup honey 
2 teaspoons vanilla extract
1/4 cup shredded coconut flakes 


Directions: 

1. Preheat oven to 350 and line cookie sheet with parchment paper. 

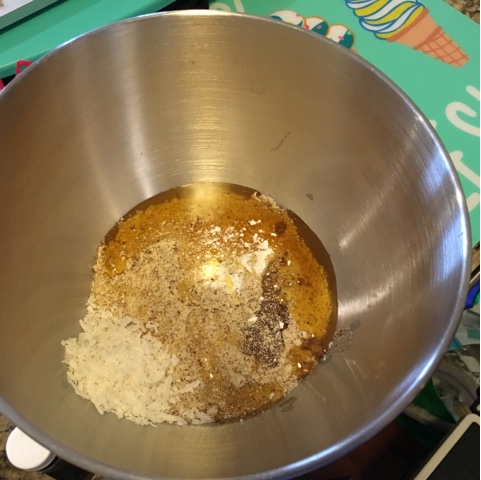
2. Place almond flour, followed by baking powder, honey, vanilla, and finally the coconut in a mixer bowl. 


3. Mix until combined. Scrape down the sides of the bowl. Mix again to ensure all is combined.  If you think your dough is too dry add more honey. 

4. Form a ball out of the dough and spoon onto prepared cookie sheet.


5. Place in preheated oven and bake for 10-12 minutes depending on size. 

6. Take out and let cool on cookie sheet for about 2 minutes and then move to wire rack. 


7. Enjoy! Would go well warmed topped with some vanilla ice cream drizzled with honey and almond butter :) (I wouldn't know or anything 🙄)


Recipe adapted from: http://www.thekitchn.com/recipe-the-worlds-easiest-cookies-just-happen-to-be-paleo-vegan-and-gluten-free-230608

Branching out....no pun intended....Beet green chips


I have been roasting beets with my veggies and love them. I never had beets really until last summer and just love them in salads! I have heard the beet greens are good for you and taste good as well. The bunch I bought this week had a lot of greens so I figured I would experiment. 

Ingredients: 
Beet greens (washed, dried, and chopped into smaller portions)
Olive or coconut oil
Sea Salt
Pepper

Directions: 
1. Preheat oven to 400 and line baking sheet with parchment paper 
2. Take prewashed, dried, and chopped greens and place in a bowl. Cover with the amount of oil you would like and make sure to mix and massage onto all greens. 
3. Sprinkle the salt and pepper on top ( amount is to your liking)
4. Place on baking sheet and place in over for 10-12 minutes or until crisp. (Keep checking to ensure  they do not burn!)
5. Enjoy! I dipped in some homemade beet and spinach dip!